


🔋1.5A 12V 6V 🚗automatic Maintenance-free gel agm dry wet deepcycle pulse repair car battery charger
🔋1.5A 12V 6V 🚗automatic Maintenance-free gel agm dry wet deepcycle pulse repair car battery charger
BUNDLE & SAVE
Couldn't load pickup availability
-
Ordered
- - -
Order Ready
- - -
Delivered

🔋1.5A 12V 6V 🚗automatic Maintenance-free gel agm dry wet deepcycle pulse repair car battery charger


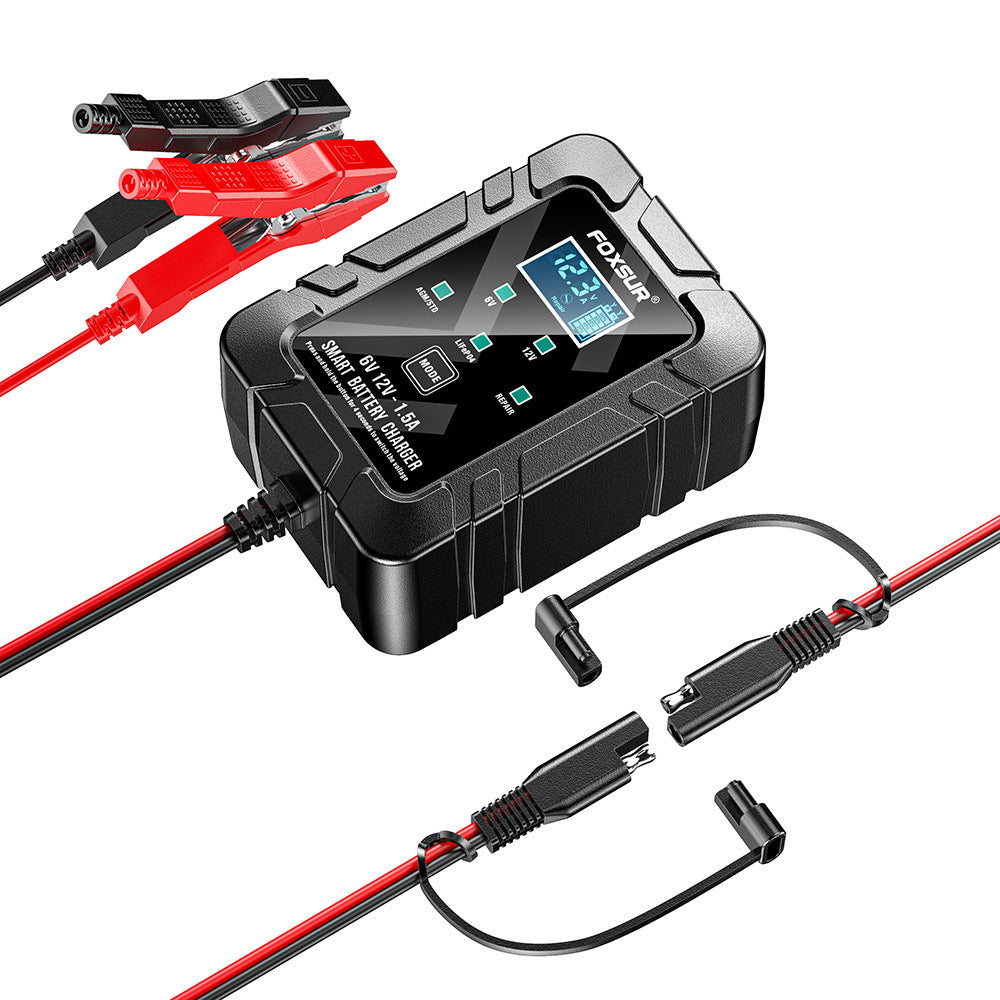

Pulse Repair Battery Charger with LCD Display
This battery charger uses the latest technologies, including lead-acid, AGM, gel, immersion (wet), calcium deep cycle, VRLA maintenance-free lead-acid, LiFePo4, battery charging, and can be used with 4Ah-30Ah batteries.

Equipped with a visual charging display
The charging status is clearly visible, allowing you to monitor the charging progress in real time and use it with greater peace of mind.

Automatic intelligent identification of 6V/12V voltage
No manual switching required, making adaptation more convenient; automatic adaptation ensures worry-free use.
Multicolumn
-

Smart chip optimization
Achieve precise control, improve equipment operating accuracy, and ensure stable equipment operation.
-

Supports 7-stage automatic charging
No manual operation required, efficient and worry-free charging.
-

Intelligent multi-protection design
Comprehensive protection for safe equipment operation and effective avoidance of equipment usage risks


How to repair batteries with pulse therapy
1. Connect the battery to the charger and turn on AC power. Then press the "Mode" button and select "Service Mode." "PUL" will be displayed on the screen.
2. The recommended service time for motorcycle batteries is 8 hours, and for car batteries, it is 16 hours.
3. Press the "Mode" button again, and the charger will automatically switch to normal charging mode.
4. Check the battery temperature during service. If the battery temperature is too high, stop the service. The maximum service time is 16 hours.
5. The battery will charge even when the charger is in service mode. If the service time is long, the battery will be fully charged. When the battery screen displays "End," it is recommended to charge for another hour. When charging is complete, carefully check that the battery is fully charged.

LCD digital displays empower users: clearly presenting data and improving ease of use.
This product is equipped with an LCD digital display screen, which displays clear and eye-catching numbers, presents data in real time without distortion, adapts to various scenarios, and allows users to quickly obtain information and enjoy a smoother operating experience.

This product features a dual-plug option! Easily accommodates diverse electrical connections.
This product supports dual plugs, allowing users to choose the appropriate plug to suit various power supply environments. Installation is simple, flexibly meeting different power connection needs and improving ease of use.

How to choose between 6V and 12V charging voltage:
1. Connect the AC power source and battery.
2. Press and hold the mode button for 4 seconds. The voltage indicator will flash. Then, press the button to switch to the corresponding voltage.

How to use
1. Verify the battery's voltage and chemistry.
2. Ensure the AC power plug is inserted into a power outlet.
3. Press the button to switch to the appropriate charging mode.
4. Verify that the battery clips or eyelet terminal connectors are correctly connected.
5. The mode LED will illuminate the selected charging mode, and the charging icon will light up (depending on the battery's health), indicating that the charging process has begun.
6. The charger can now remain connected to the battery at any time to provide maintenance charging.